Tiles are one of those home features that seem to always look perfect—until you notice the grout. Those narrow lines between tiles, whether in your kitchen, bathroom, or hallway, have a sneaky way of turning from crisp white to dull gray or even brown over time. I’d been ignoring mine for months, convincing myself it wasn’t that bad. But one day, under the bright afternoon light, I caught a glimpse of my bathroom floor, and it was impossible to unsee—the grout looked dirty, tired, and just plain old.
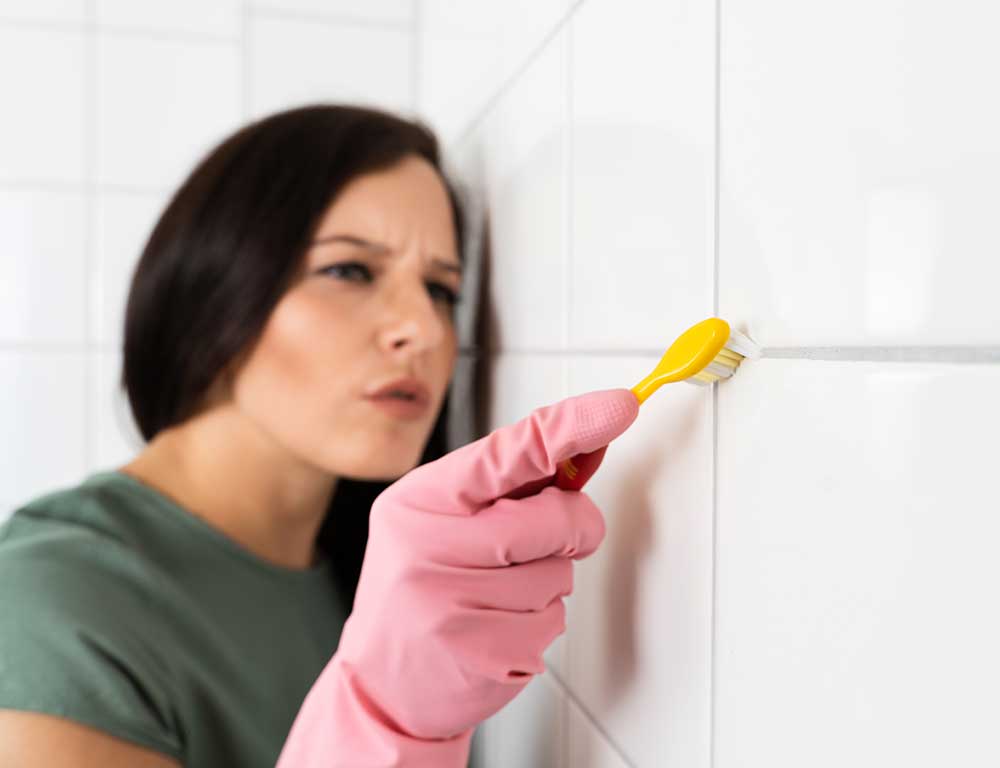
Replacing tile wasn’t an option, and hiring a professional cleaner felt excessive for such a small space. That’s when I remembered a cleaning hack I’d read about countless times but never tried myself: using an old toothbrush to scrub the grout.
It sounded simple, almost too simple—but I decided to give it a go. And to my absolute surprise, that little toothbrush turned out to be a miracle tool. After one cleaning session, my bathroom tiles looked almost newly installed—bright, fresh, and sparkling.
Here’s how I did it, what I learned, and why this low-cost trick is one of the best cleaning discoveries I’ve ever made.
The Hidden Problem: Why Grout Gets So Dirty
Before we jump into the cleaning process, it helps to understand why grout gets so filthy in the first place.
Grout is naturally porous, meaning it absorbs moisture, dirt, and soap residue like a sponge. In bathrooms, it’s exposed to shampoo, body wash, hard water, and mildew. In kitchens, it’s grease, food splatters, and spills. Over time, these build up, staining the grout and dulling the overall look of your tiles.
Even regular mopping often makes it worse—dirty mop water seeps into grout lines, leaving behind grime rather than removing it. That’s why those narrow lines between tiles become dark and dingy even if the tiles themselves still look clean.

Why a Toothbrush Works So Well for Grout
When I first read about the toothbrush trick, I thought it was a gimmick. But the more I thought about it, the more it made sense. Toothbrushes are precisely designed to scrub small spaces, loosen buildup, and reach tight areas—exactly what grout cleaning requires.
A mop or sponge simply can’t get deep into those thin crevices, but a toothbrush can. Its bristles offer the perfect mix of flexibility and stiffness to lift dirt without damaging the grout. Plus, most of us already have an old toothbrush lying around—making this the most budget-friendly cleaning tool imaginable.
Step-by-Step: How I Made My Grout Look New Again
Here’s the exact method I used. You only need a few basic household items and a little elbow grease.
What You’ll Need:
- An old toothbrush (medium or firm bristles work best)
- Baking soda
- White vinegar
- A small bowl
- A spray bottle
- Warm water
- Microfiber cloth or towel
Optional: A few drops of lemon juice or essential oil (for fragrance and extra cleaning power).
Step 1: Make the Grout Cleaner Paste
In a small bowl, I mixed 3 tablespoons of baking soda with 1 tablespoon of water to form a thick paste. Baking soda is a gentle abrasive that breaks down grime without scratching tiles.
If your grout is especially stained, you can add a little lemon juice—it helps lift discoloration and leaves a fresh scent.
Step 2: Apply the Paste to the Grout
Using the toothbrush, I spread the baking soda paste along the grout lines, making sure to coat them evenly. The mixture clings nicely, so it doesn’t drip away like liquid cleaners do.

I let it sit for about 10–15 minutes to allow the baking soda to loosen dirt and mildew.
Step 3: Spray Vinegar Over the Paste
Next, I filled a spray bottle with equal parts white vinegar and warm water and lightly misted it over the baking soda paste. Immediately, the mixture began to fizz—tiny bubbles forming as the vinegar reacted with the baking soda.
That fizzy action is what does the magic—it lifts grime and kills bacteria hiding deep in the grout.
I let the fizzing continue for about 5 minutes before moving to the next step.
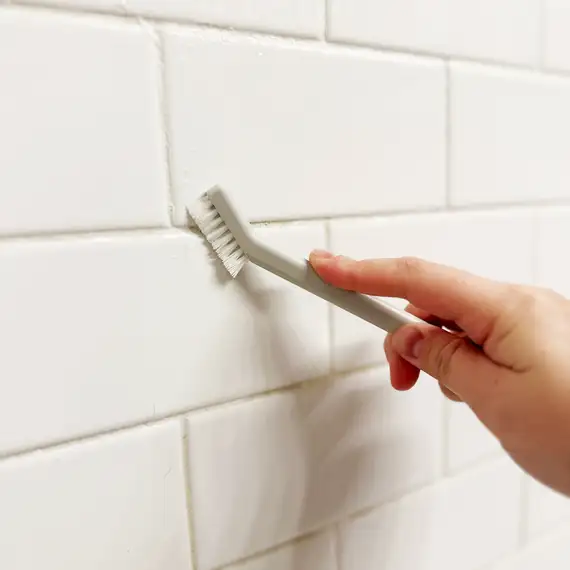
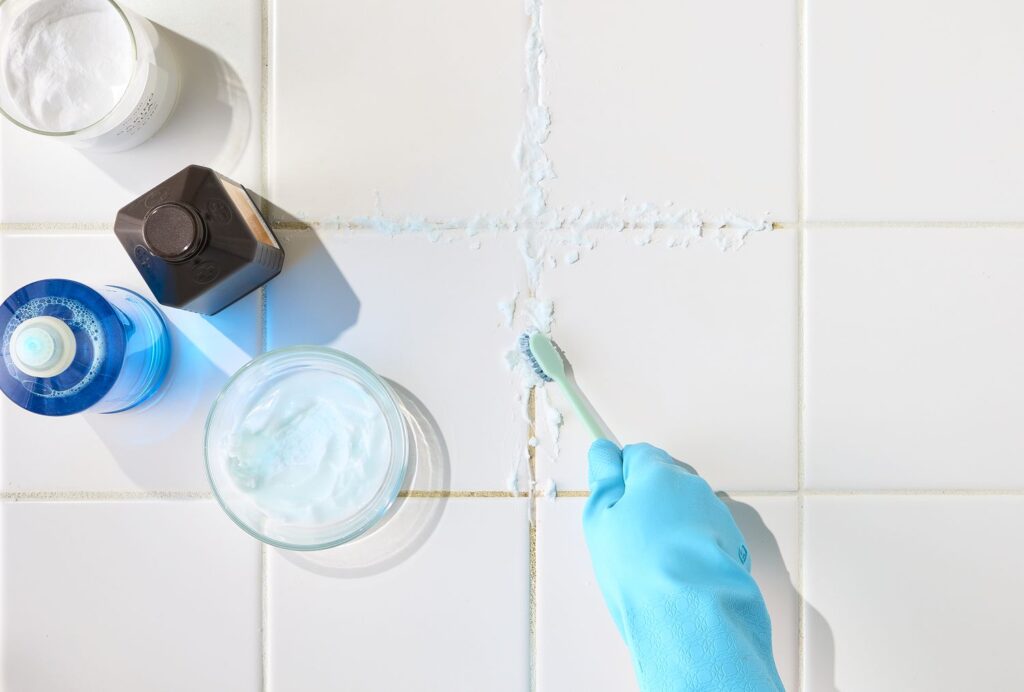
Step 4: Scrub with the Toothbrush
Here’s where the real transformation happens.
I dipped the toothbrush in warm water and started scrubbing each grout line in a circular motion. Within seconds, I could see the grime lifting. The white bristles quickly turned gray—a satisfying (and slightly gross) sign that it was working.
For stubborn spots, I pressed a little harder or added more paste. The firm bristles were perfect for getting deep into the crevices without damaging the grout or tile.
I worked in small sections—about 2–3 tiles at a time—to keep the cleaning manageable and ensure no area dried out before I finished scrubbing.
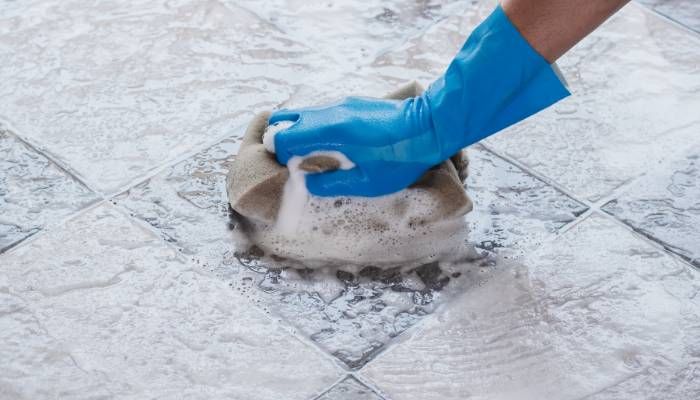
Step 5: Wipe Away the Residue
Once I’d scrubbed the entire area, I used a damp microfiber cloth to wipe away the baking soda and dirt residue. The difference was instantly visible. My once-dull grout now looked bright, clean, and almost brand new.
For a finishing touch, I gave the area a quick rinse with warm water to remove any remaining cleaner and dried it with a towel to prevent new buildup.
The Incredible Results
The transformation was dramatic. What had looked like old, worn-out tiles suddenly looked like something out of a renovation commercial. The grout lines were crisp white again, making the entire floor look brighter and newer.
The best part? The entire process took less than an hour, cost virtually nothing, and used ingredients I already had in my kitchen.
When I stepped back to admire the results, I honestly couldn’t believe I’d achieved that kind of cleanliness with something as simple as an old toothbrush and a few pantry staples.
Why This Method Works Better Than Store-Bought Cleaners
Store-bought grout cleaners often contain strong chemicals like bleach or ammonia, which can be harsh on both your tiles and your lungs. While they can whiten grout, they don’t always clean it effectively—they often just mask the stains.

The baking soda and vinegar combo, on the other hand, naturally lifts dirt, disinfects, and neutralizes odors without any harsh side effects. Plus, it’s safe for almost all types of tile—ceramic, porcelain, and even natural stone (though with stone, you should skip the vinegar and just use baking soda and water).
And unlike commercial cleaners, this DIY method doesn’t require gloves, masks, or ventilation—it’s gentle, eco-friendly, and family-safe.
Tips for Keeping Grout Clean Longer
After spending an afternoon restoring my grout, I wanted to make sure it stayed that way. Here are a few habits I’ve adopted since:
- Seal the Grout: Once clean, apply a grout sealer to protect against moisture and stains. It’s a simple step that keeps grout looking fresh for months.
- Wipe Down Tiles Regularly: In bathrooms, use a squeegee or cloth to remove water after showers. This prevents mildew buildup.
- Use a Mild Cleaner Weekly: Mix a little vinegar and water in a spray bottle for a quick weekly wipe-down.
- Avoid Harsh Soaps: Residue from soaps and shampoos can cling to grout, so use gentle or natural products when possible.
- Spot Clean Early: If you notice spills or stains, clean them immediately. The longer they sit, the harder they are to remove.
These small habits keep your tiles looking newer for much longer—and prevent you from having to do another deep scrub anytime soon.
Other Smart Uses for an Old Toothbrush
Once I saw how effective the toothbrush was on grout, I started using it in other parts of the house too. Its precision and scrubbing power make it an unsung hero for all kinds of cleaning jobs:
- Faucet bases and handles – Gets rid of mineral buildup around tight edges.
- Window tracks – Perfect for scraping out dust and grime.
- Kitchen appliances – Ideal for cleaning crumbs and grease around stove knobs.
- Shower heads and drains – Removes soap scum and mineral deposits.
- Sneaker soles – Restores white rubber edges easily.
It’s a small but mighty tool that can breathe new life into your home’s nooks and crannies.
The Eco-Friendly Angle
What I also love about this method is how sustainable it is. Instead of tossing an old toothbrush into the trash, you give it a second life as a cleaning tool. Pair that with natural, non-toxic cleaners like baking soda and vinegar, and you’ve got an eco-friendly solution that’s good for both your home and the planet.

No plastic bottles, no chemical fumes—just simple, effective cleaning.
Final Thoughts: The Power of Simple Tools
Sometimes, the most effective solutions don’t come in fancy packaging or cost a fortune. They come from rethinking what we already have.
That old toothbrush sitting in your bathroom drawer? It’s a hidden cleaning superhero. Combined with basic household ingredients, it can make your grout—and your entire tile surface—look freshly installed.
After seeing my tiles sparkle again, I couldn’t help but smile. What once looked like a costly renovation project turned out to be a one-hour DIY success story.
So the next time you’re about to throw away your old toothbrush, stop for a second. You might just be holding the most powerful cleaning tool in your home.