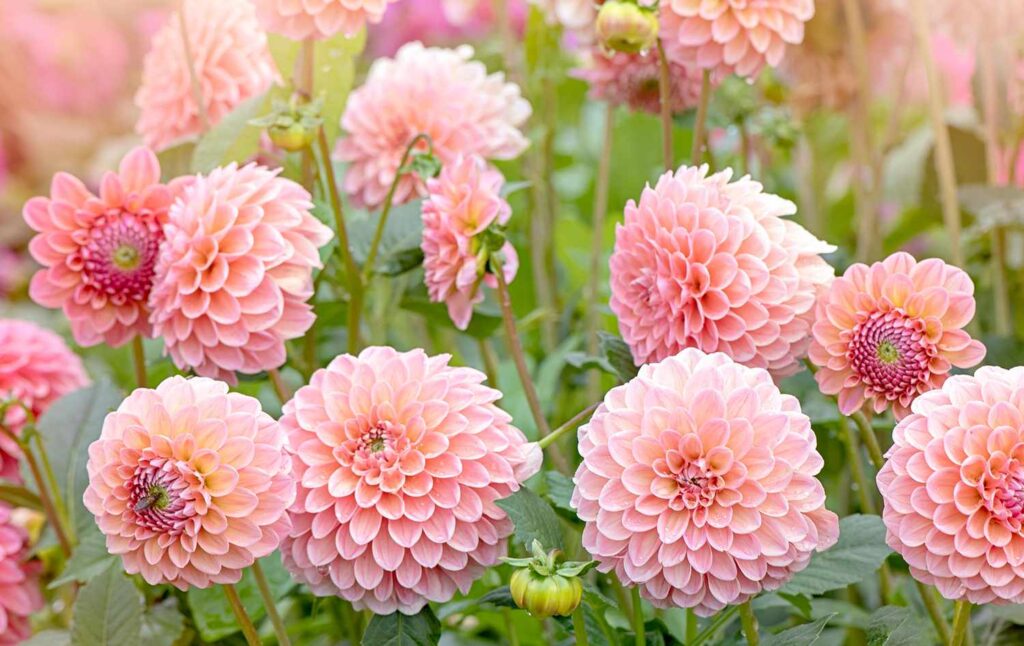
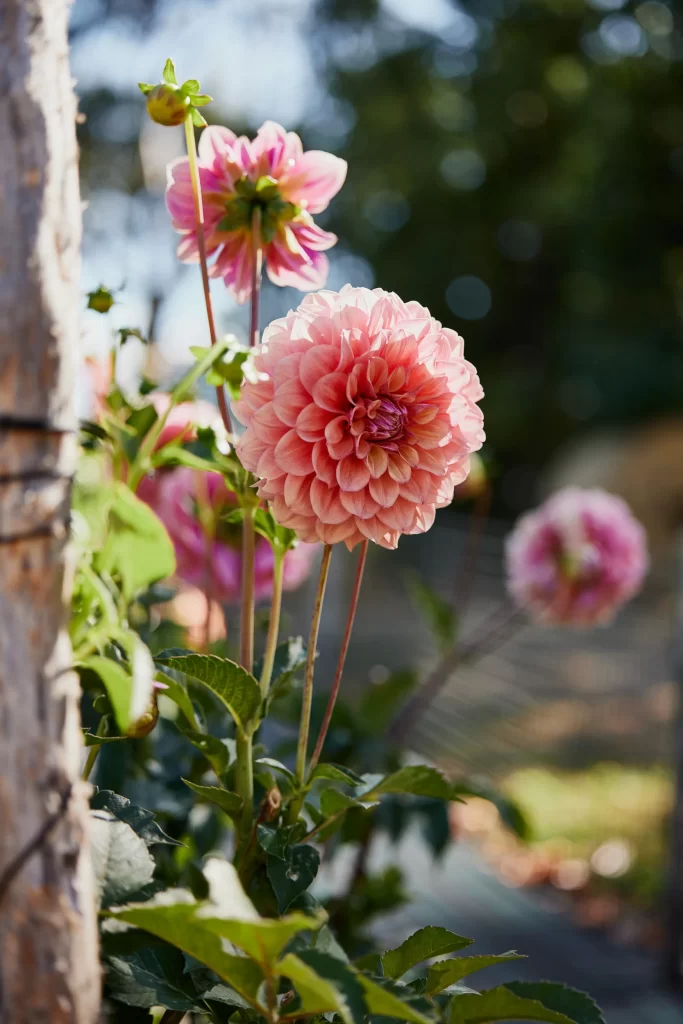
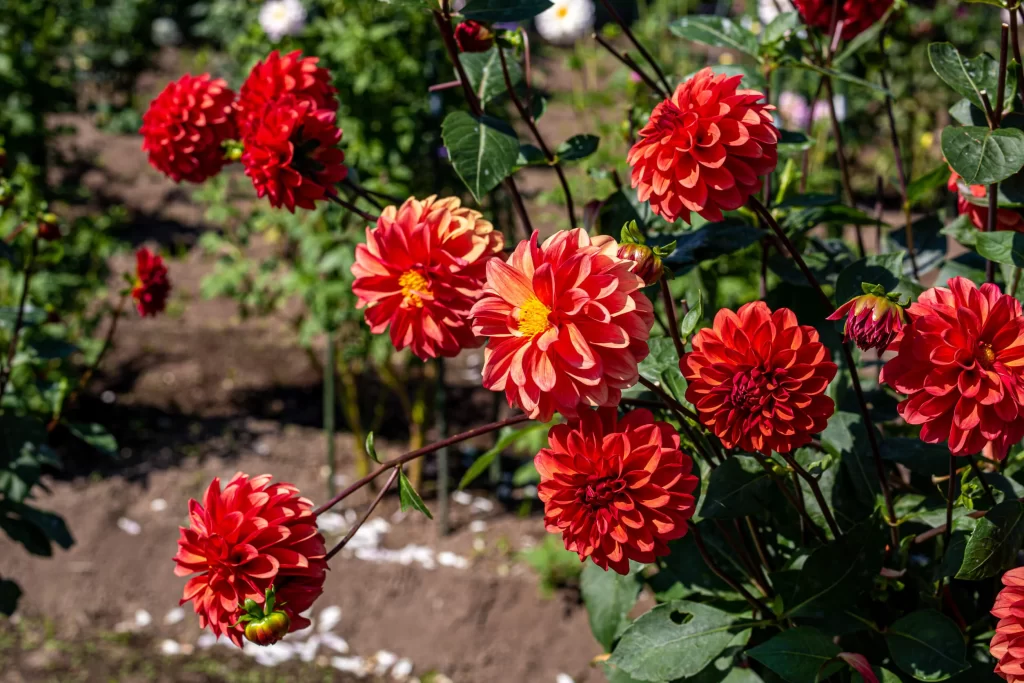
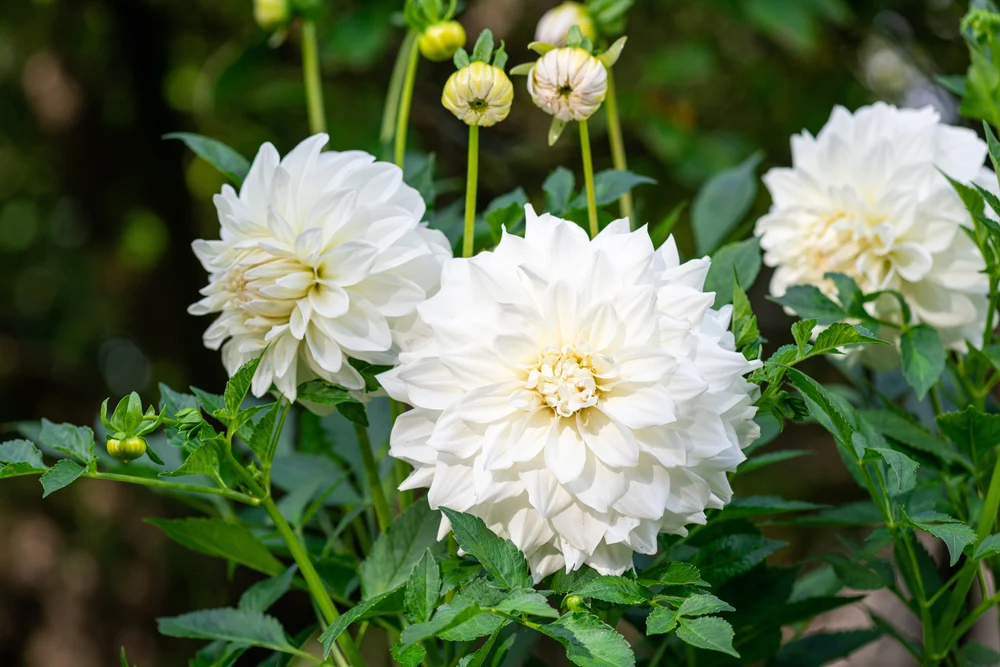
Dahlias are some of the most breathtaking flowers you can grow at home. With their wide range of shapes, bold colors, and incredible sizes—from small pompons to giant dinner-plate blooms—dahlias add drama and beauty to any garden. The best part? They’re surprisingly simple to grow from tubers, even if you’re a beginner.
Whether you have a backyard garden, balcony containers, raised beds, or just a sunny patch of soil, growing dahlias from tubers is one of the most rewarding gardening experiences you can enjoy.
This guide walks you through everything you need to know: choosing tubers, planting them correctly, caring for growing plants, and enjoying abundant summer-to-autumn blooms.
What Are Dahlia Tubers?
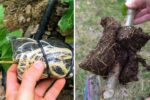
Dahlia tubers are swollen underground storage roots that look similar to sweet potatoes. Each tuber contains:
- A storage body (the plump, potato-like part)
- A neck
- A section of crown
The crown is where the eyes or buds form—this is essential, because only tubers with viable eyes will sprout.
Tubers store energy, allowing dahlias to grow vigorously and produce huge, colorful blooms.
Why Grow Dahlias from Tubers?
Dahlias can be grown from seeds or cuttings, but tubers offer several advantages:
✔ Faster growth
Tubers sprout more quickly than seeds, producing flowering plants earlier.
✔ More reliable
What you see is what you get—tubers grow true to their variety with predictable colors and shapes.

✔ Large, impressive blooms
Tubers produce strong, healthy plants capable of blooming for months.
✔ Easy to store and replant
You can dig them up in winter and replant year after year.
1. Choosing the Right Dahlia Tubers
Your growing success starts with quality tubers. Look for tubers that are:
- Firm, not soft or shriveled
- Free from mold or rot
- Attached to a piece of crown (where the eyes are)
- Medium sized—oversized tubers can rot, while tiny tubers may lack energy
Where to Buy Tubers
- Local nurseries
- Online specialty growers
- Garden centers in early spring
- Seed catalogs
Choose varieties based on your space and desired bloom type:
- Dinner-plate dahlias — enormous blooms up to 12 inches
- Cactus dahlias — spiky, vibrant flowers
- Pompon dahlias — small, globe-shaped blooms
- Decorative dahlias — full, lush flowers in many forms
If you’re planting in containers, look for dwarf or compact varieties.
2. When to Plant Dahlia Tubers
Dahlias are warm-season plants. Planting too early exposes tubers to cold soil and rot.
Ideal Planting Time
Plant tubers after the last frost when:
- Soil temperature reaches 15°C–18°C (60°F–65°F)
- Nights stay consistently above 10°C (50°F)
In most regions:
- Late February–April in warm climates
- April–June in cooler climates
3. Preparing the Soil or Pot
Dahlias thrive in light, fertile, well-draining soil.
Soil Requirements
- Slightly acidic to neutral (pH 6.2 to 7.0)
- Rich in organic matter
- Well-drained—standing water will rot tubers
If Planting in the Ground
Amend soil with:
- Compost
- A handful of bone meal (promotes root growth)
- A bit of sand if soil is heavy clay
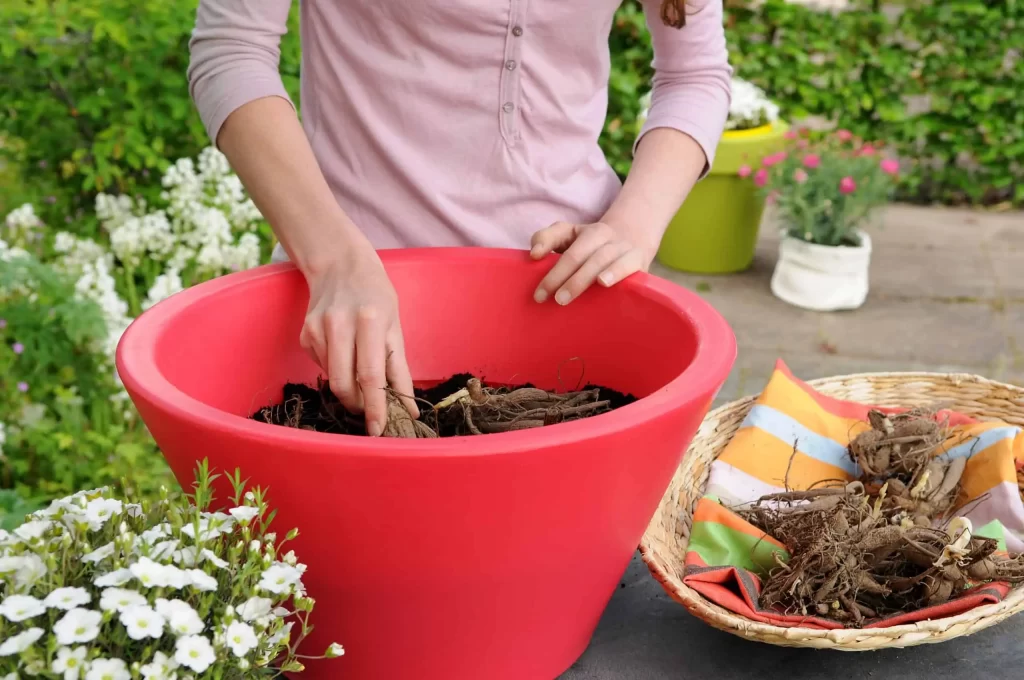
If Growing in Pots
Choose:
- Containers 12–18 inches deep
- Pots with good drainage holes
Use:
- A high-quality potting mix with perlite or sand
- Avoid heavy garden soil in containers
4. Planting Dahlia Tubers Properly
Planting tubers the right way ensures strong, healthy growth.
How to Plant
- Dig a hole or prepare a pot 4–6 inches deep.
- Lay the tuber horizontally with the eye facing up at the top of the crown.
- Cover lightly with soil—just 2–3 inches at first.
- Do not water immediately. Wait until you see sprouts.
Spacing
- Large dahlias: 18–24 inches apart
- Medium dahlias: 12–18 inches
- Small varieties: 10–12 inches
Staking
Dinner-plate and tall varieties need support.
Add stakes or cages at planting time to avoid damaging roots later.
5. Watering Your Dahlia Tubers
Dahlias are sensitive to overwatering, especially before sprouting.
Before Sprouting
- Do not water at planting
- Moist soil can rot tubers
After Sprouting
When green shoots appear:
- Water deeply 2–3 times per week
- Keep soil evenly moist, not soggy
Summer Watering
Increase watering during hot weather.
Mulch lightly to retain moisture.
6. Feeding Dahlias for Strong Blooms
Dahlias love nutrition, but too much nitrogen makes them leafy instead of flowery.
Best Fertilizers
Choose fertilizers labeled:
- Low nitrogen
- High phosphorus and potassium
Look for NPK ratios like: - 5-10-10
- 10-20-20
Feeding Schedule
- First feeding: when plants are 12 inches tall
- Then every 3–4 weeks
- Stop feeding 30 days before expected frost
Organic options like bone meal, fish emulsion, or compost tea also work beautifully.
7. Providing Sunlight and Temperature
Dahlias love warmth and sunlight.
Sunlight
- Require 6–8 hours of direct sunlight daily
- More sun = more blooms
- In very hot climates, provide light afternoon shade
Ideal Temperature
- Day: 18°C–25°C (65°F–77°F)
- Night: above 10°C (50°F)
8. Caring for Growing Dahlia Plants
Once dahlias sprout and grow, a bit of care helps maximize bloom production.
Pinching
When plants reach 12–16 inches, pinch off the top 3–4 inches.
This encourages:
- Bushier growth
- More flower stems
- Larger blooms
Deadheading
Remove spent flowers regularly.
This:
- Stimulates continuous blooming
- Keeps plants looking tidy
Pest Management
Common pests include:
- Aphids
- Earwigs
- Caterpillars
- Snails and slugs
Natural control methods:
- Neem oil spray
- Hand-picking
- Diatomaceous earth
- Companion planting with marigolds
9. Supporting Tall Dahlias
Big dahlias often become heavy. Support them early to prevent breakage.

Support Options
- Wooden stakes
- Tomato cages
- Trellis frames
- Bamboo teepees
Tie stems loosely with soft twine or garden tape as they grow.
10. Flowering Time and Enjoyment
Dahlias begin blooming:
- Around 8–12 weeks after planting
- Peak from mid-summer to late autumn
Cutting flowers actually encourages more blooms.
Always cut stems early in the morning for the freshest arrangements.
11. How to Overwinter and Save Tubers
In warm climates where winters don’t freeze:
- Leave tubers in the ground
- Add mulch to protect them
In colder regions:
- After the first frost blackens the leaves, cut stems down to 4 inches.
- Dig up tubers carefully using a fork.
- Brush off soil (don’t wash).
- Let them dry in a cool, dry place for 7–10 days.
- Store in boxes filled with:
- Peat moss
- Wood shavings
- Sand
Keep tubers in a cool (5°C–10°C/40°F–50°F), dark space until spring.
Common Mistakes to Avoid
❌ Planting too early in cold soil
Causes rot and poor sprouting.
❌ Overwatering early
Tubers decay before they grow.
❌ Using too much nitrogen
Leads to lush leaves and few flowers.

❌ Forgetting to stake tall varieties
Heavy blooms can snap stems in wind.
❌ Storing tubers in damp areas
Causes mold and rot.
Final Thoughts: Growing Dahlias Is Easier Than You Think
Growing dahlias from tubers at home is a joyful, rewarding experience. With just a little preparation, these stunning flowers explode into colorful blooms that brighten gardens, patios, balconies, and flower beds all summer long.
Remember:
- Start with healthy tubers
- Plant after frost
- Avoid watering until sprouts appear
- Give them sun, support, and proper fertilizer
- Deadhead and pinch for more blooms
Follow these steps, and you’ll enjoy an abundance of dazzling dahlias year after year.