lf you’ve ever dreamed of growing your own food but aren’t sure where to start, potatoes are one of the best crops for beginners. They’re forgiving, productive, and incredibly satisfying to harvest—especially when you dig up your first batch of golden tubers from the soil.
Whether you have a sprawling backyard, a small raised bed, or even a few containers on a sunny balcony, you can grow fresh, delicious potatoes with ease. In this guide, we’ll explore simple, step-by-step potato growing tips for beginners—from preparing the soil and planting your seed potatoes to harvesting and storing your homegrown bounty.
Get ready to turn a few humble seed potatoes into a basket full of homegrown goodness!
1. Why Potatoes Are Perfect for Beginners
There are plenty of reasons potatoes are one of the easiest and most rewarding vegetables to grow:
- They’re resilient: Potatoes tolerate a range of soil conditions and climates.
- They produce abundantly: Even a few seed potatoes can yield several pounds of food.
- They’re versatile: You can grow them in the ground, raised beds, or containers.
- They store well: Properly cured potatoes last for months, giving you long-term value.
Plus, there’s something special about growing a crop that forms hidden underground—harvesting feels like unearthing buried treasure. For beginners, it’s a hands-on lesson in how soil, water, and patience come together to create real food.
2. Choosing the Right Potato Variety
Before you plant, decide what kind of potatoes you want to grow. Different varieties suit different purposes and climates.
Here’s a simple breakdown to help you choose:
- Yukon Gold: Buttery flavor and creamy texture; great for mashing and roasting.
- Red Pontiac: Moist and smooth; perfect for potato salads.
- Russet Burbank: Classic baking potato with a fluffy interior.
- Fingerling Potatoes: Small and flavorful; ideal for roasting or pan-frying.
- Purple Majesty: Beautiful purple skin and flesh; packed with antioxidants.
For beginners, Yukon Gold or Red Pontiac are excellent choices—they’re easy to grow, productive, and versatile in the kitchen.
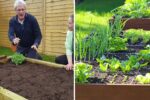
3. Preparing the Perfect Soil
Healthy soil is the foundation of a great potato harvest. Potatoes thrive in loose, well-drained, and slightly acidic soil (pH 5.5–6.5).
Here’s how to prepare your garden bed:
- Choose a sunny spot that receives at least 6–8 hours of sunlight daily.
- Loosen the soil to about 10–12 inches deep so the tubers can expand easily.
- Mix in compost or aged manure to enrich the soil with nutrients.
- Avoid compacted or heavy clay soil, which holds too much water and can cause rot.
If your soil is dense or rocky, don’t worry—you can still grow excellent potatoes in raised beds, large containers, or even grow bags.
4. Start with Certified Seed Potatoes

One of the most common beginner mistakes is using store-bought potatoes for planting. These are often treated with chemicals to prevent sprouting and may carry diseases.
Instead, buy certified seed potatoes from a garden center or trusted supplier.
Before planting:
- Cut larger seed potatoes into chunks about the size of an egg, making sure each piece has 1–2 “eyes.”
- Let them dry for a day or two to form a protective skin (this prevents rot).
- Optional: Pre-sprout (or “chit”) your potatoes by placing them in a cool, bright place for 1–2 weeks until short green shoots appear.
Starting with healthy, pre-sprouted seed potatoes gives your garden a strong head start.
5. How to Plant Potatoes the Easy Way

There are several simple methods for planting potatoes—choose the one that fits your space and comfort level.
A. Traditional Trench Method (for garden beds)
- Dig a trench 6–8 inches deep and 2–3 feet apart.
- Place seed potatoes 12 inches apart, eyes facing upward.
- Cover with 3–4 inches of soil.
- As plants grow, hill up the soil around the base every few weeks. This prevents sunlight from reaching the tubers (which can make them turn green and toxic) and encourages more tuber growth.
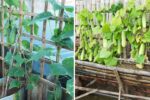
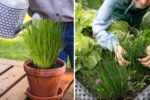
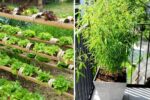
B. Raised Bed or Container Method
Perfect for beginners and small spaces!
- Fill a large container or grow bag with 6 inches of soil.
- Add seed potatoes and lightly cover.
- As plants grow, keep adding soil until the container is nearly full.
This method keeps weeds to a minimum and makes harvesting much simpler—you can just dump out the container when the plants die back.
6. Watering and Feeding Your Potato Plants
Potatoes need consistent moisture but don’t like soggy conditions.
- Water deeply once or twice a week (about 1–2 inches total).
- Water in the morning so the leaves dry quickly, preventing fungal diseases.
- During hot weather, check soil moisture often—dry soil can lead to small or cracked potatoes.
When it comes to fertilizer, less is more. Too much nitrogen produces leafy plants with few tubers. Instead, use:
- Compost or organic vegetable fertilizer at planting time.
- Bone meal or wood ash mid-season to boost tuber development.
Healthy, balanced feeding ensures that your potatoes will be flavorful and firm.
7. Mulching for Easy Maintenance

Mulching is one of the simplest tricks for low-maintenance potato growing. Spread a layer of straw, dry leaves, or grass clippings around your plants once they emerge.
Benefits of mulching include:
- Retaining soil moisture
- Preventing weeds
- Protecting tubers from sunlight
- Regulating soil temperature
- Adding organic matter as it decomposes
For container growers, mulch also helps keep the soil from drying out too quickly in hot weather.
8. Dealing with Common Potato Problems
Even with the best care, beginners may face a few challenges—but don’t worry, most are easy to handle naturally.
Pests:
- Colorado Potato Beetles: Hand-pick beetles and larvae; use neem oil spray if necessary.
- Aphids: Rinse off with water or use insecticidal soap.
Diseases:
- Blight (fungal disease): Water the soil, not the leaves, and ensure good air circulation.
- Scab (bumpy skin): Avoid alkaline soils and use slightly acidic compost.
Prevention Tips:
- Rotate your crops—don’t plant potatoes in the same spot every year.
- Remove diseased leaves or plants immediately.
- Keep soil healthy with organic matter and proper drainage.
A proactive approach keeps your garden clean and thriving.
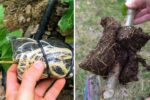
9. Harvesting Your Homegrown Potatoes
The most exciting moment for any new gardener is harvest time!
- For baby (new) potatoes: Harvest 2–3 weeks after the plants flower. These are tender, sweet, and great for boiling or salads.
- For full-size potatoes: Wait until the vines yellow and die back. This indicates that the tubers have matured.
Use a garden fork or your hands to gently lift the potatoes from the soil. Be careful not to bruise them—damaged potatoes don’t store well.
10. Curing and Storing Your Harvest
To store your potatoes for the long term:
- Cure them for 1–2 weeks in a cool (50–60°F / 10–15°C), dark, and well-ventilated area. This toughens the skins for better storage.
- Store in a dark, cool place (40–50°F / 4–10°C) like a basement or pantry.
- Keep them in burlap bags, paper sacks, or wooden crates—not plastic.
- Don’t refrigerate—cold temperatures convert starch to sugar, changing flavor.
Properly cured and stored potatoes can last for several months—giving you fresh, homegrown food well beyond the harvest season.
11. Cooking with Your Homegrown Potatoes
After all your care and patience, it’s time to enjoy the reward! Freshly dug potatoes are incredibly flavorful and work beautifully in countless vegetarian dishes.
Try these simple recipes to celebrate your harvest:
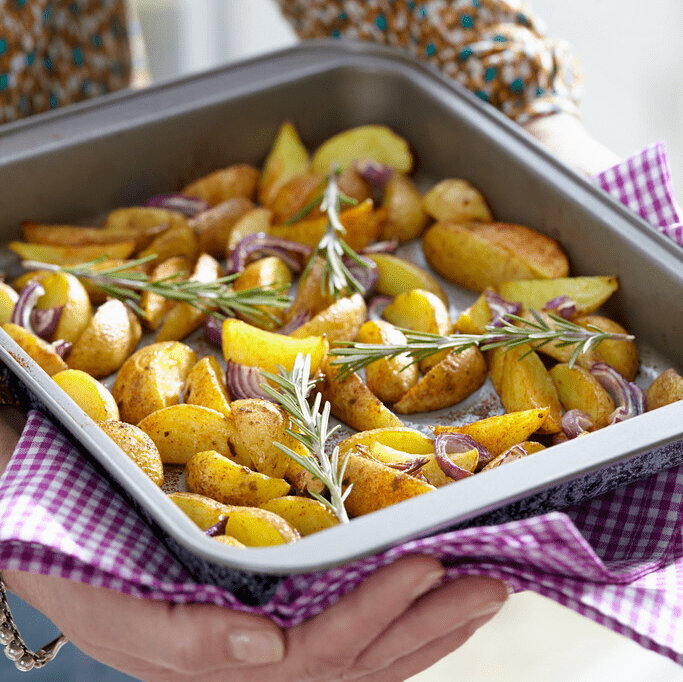
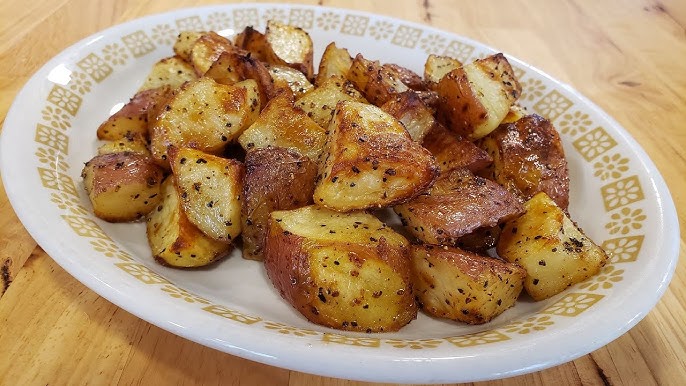
- Herb-Roasted Potatoes: Toss small potatoes with olive oil, rosemary, and garlic, then roast until golden.
- Mashed Potato Bowls: Layer creamy mashed potatoes with sautéed veggies and gravy.
- Potato and Lentil Curry: Combine diced potatoes with lentils, tomatoes, and Indian spices for a hearty plant-based meal.
- Crispy Potato Tacos: Roast potato cubes with paprika and fill tacos with beans, avocado, and salsa.
- Simple Potato Soup: Simmer potatoes, carrots, onions, and herbs for a cozy homemade soup.
These meals showcase the natural flavor of your garden-grown potatoes—and prove how rewarding your efforts can be.
12. Quick Troubleshooting for Beginners
| Problem | Possible Cause | Easy Fix |
|---|---|---|
| Small tubers | Lack of water or nutrients | Water consistently, add compost mid-season |
| Green potatoes | Exposure to sunlight | Hill up soil or add mulch |
| Misshapen potatoes | Compact soil | Loosen soil before planting |
| Rotting tubers | Overwatering | Improve drainage and water only when needed |
A few adjustments can make the difference between a small harvest and a bumper crop.
13. The Joy of Growing Your Own Food
Growing potatoes is more than a gardening project—it’s a reminder of how simple and fulfilling food production can be. Watching your plants grow from small seed pieces into flourishing vines, then harvesting your own supply of nutritious tubers, connects you deeply to nature and to what you eat.
You don’t need advanced tools or years of experience. Just sunlight, soil, water, and a little patience. Each step—from planting to cooking—teaches you the rhythm of growth and reward.
And once you taste your first homegrown potato, you’ll understand why so many gardeners call this crop “the ultimate beginner’s success.”
Conclusion: Start Small, Grow Big
Starting your first potato garden doesn’t have to be complicated. With a few simple techniques, you can produce delicious, healthy potatoes right in your backyard or even on your balcony.
Begin with good seed potatoes, give them rich soil and consistent care, and in a few months, you’ll be enjoying fresh, flavorful spuds in your favorite homemade meals.
So grab your gloves, dig a little, and start planting. The journey from seed to plate is easier than you think—and every potato you grow is proof that great food truly starts in your own garden.